How the Sun Rose - Tutorials
Monday, July 31, 2017
Wednesday, April 6, 2011
Moving Pictures Tutorial
See my blog post about moving pictures here: Moving Pictures & Storytelling
Begin by painting a background scene with watercolors.
Moving picture pages are quite easy to make.
Begin by painting a background scene with watercolors.
Next, draw or paint a small image to be the characters of your story. I, having absolutely no artistic ability, copied pictues of characters from books and cut out animal pictures from magazines and glued them onto thick watercolor paper. Glue or tape your image on to popsicle sticks, which are sold at craft stores. For people, we simply drew a face on the stick so it coud be anyone - mama, baby, daddy, gnome, king, etc.


After your watercolor background has dried, use an exacto knife to cut a slit long enough to provide space for movement for your characters. You can cut curved lines for animals coming down a mountain or a diagnal line for a bird flying in the sky.
After you slide in the popsicle stick, you can glue a wide piece of paper onto the popsicle stick just under where it meets the slit to make it so the character cannot be pulled out. I did not do this to ours as we want ours to move around to other places on the page.
If you want additional movement in your picture, paint a blue circle, divide it ino quarters and on each quarter, paint a sun, full moon, clouds, sliver of a moon. Using an exacto knife, cut a 1/4 circle window in the sky. Attach the circle near the window using a brad. Now your little one can turn the circle to make the scene day or night, sunny or cloudy.


Now you have a venue to encourage imaginative play. Who knows what adventures will be told?


Wednesday, March 23, 2011
Origami Paper Crane
I decided to post a tutorial for making origami cranes to encourage others to participate in the 1000 Cranes for Japan project. You can see the original post in my blog How The Sun Rose, found here: 1000 Cranes for Japan. Follow this link to see how we incorporated cranes with our spring nature table: : Spring Nature Table. Begin with a square piece of paper - scrapbook paper works great. With the wrong side up, fold the paper in half and half again, then fold at the corners in half, open and do it again at the opposite corners.  At a corner fold the sides to the center mark, open and repeat for each corner.
  When you open your paper, your folds should like this.
  Next, fold in the areas that I shaded green.
  When you do the first two opposing sides it will look like this.
  When you fold all 4 centers in, it will look like this.
  Pull all 4 corners together...
 At a corner fold the sides to the center mark, open and repeat for each corner.
  When you open your paper, your folds should like this.
  Next, fold in the areas that I shaded green.
  When you do the first two opposing sides it will look like this.
  When you fold all 4 centers in, it will look like this.
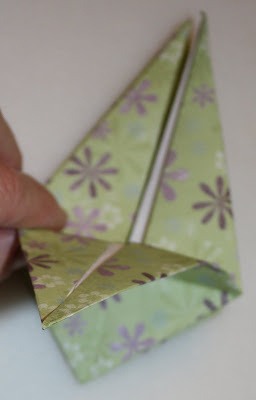
  Pull all 4 corners together...
 It will look like the photo below:
Subscribe to:
Posts (Atom)


